Interior and furniture projects offer a great opportunity to put your creativity into practice. At the same time, you give old things a new life and save nature. Doing things with your own hands is good for your body and mind, and the finished result will delight you for a long time! One of the easiest ways to create a big impact is to use transfers. The technique, which is extremely popular worldwide, has also landed in Finland in recent years. The technique has several names: transfers, furniture transfers, decals, deco transfers… For the sake of simplicity, we will stick to the term transfer in this article. In this article, we will go through the following:
- What is a transfer?
- What can decals be used for, what materials are suitable as a substrate?
- How are decals used?
- TOP 6 tips for a professional result
- Tools for using decals
- Inspiration gallery - amazing transfer projects
- Transfers by theme
What are decals?
Transfers are images, patterns and designs printed on a film resembling contact plastic, which adhere to various surfaces. The transfer adheres to the selected surface easily and conveniently, meaning that with the help of transfers you can create wonderful works of art without having to know how to paint or draw. There is a huge range of patterns and images available; the most popular designs at the moment are clearly floral patterns and patterns used especially for children's room decoration. With transfers you can easily create a detailed and complex pattern on furniture or even on the wall without the need for advanced artistic skills.

What can decals be used for?
Short answer: almost anywhere. Transfers are made to last, so they can also be used on everyday objects. Furniture, walls, storage boxes, mirrors… Let your imagination run wild!
You can use transfers on almost any surface:
- Wood
- Concrete
- Particleboard
- Ceramics
- Glass
- Paper
- Metal
- Fabric
- Cardboard
- Leather
- Canvas
- Plastic
- Mirror
The surface may be painted, but remember to let the paint dry thoroughly for at least 24 hours before adding the decal.
Transfers may not stick to waxed surfaces unless the waxing is several months old. It is also worth remembering to check the condition of the surface. If the surface is cracked, such as really dry wood or otherwise damaged material, the transfer may not be successful. Also, peeling paint and other damaged surfaces are not a good option. So do the groundwork well, and the transfer will come out just right!
How to use decals - step by step instructions for using decals
The workflow is simple: do the basic work, such as cleaning and painting if necessary, attach the transfer to the surface and finish with wax or varnish. In this section, we will take you by the hand through the necessary steps, starting with preparation. You will receive detailed instructions and tips to achieve an even and bubble-free finish.Preparations before attaching the transfer
Proper preparation of the furniture or other surface is important to ensure a successful outcome. A good primer will ensure that the transfer will look good and last a long time. Clean the surface thoroughly, making sure that it is free of oil, grease and dust. Remember to ensure that the surface is intact and as flat as possible. If you paint the surface before applying the transfer, allow the painted object to dry for at least 24 hours before applying the transfer.
Attaching and finishing the transfer
Transfers are generally packaged in either a tube or a plastic film package. Redesign with Prima transfers, which are packaged in a tube, come with a wooden spatula. Start by opening the package and removing the transfer.
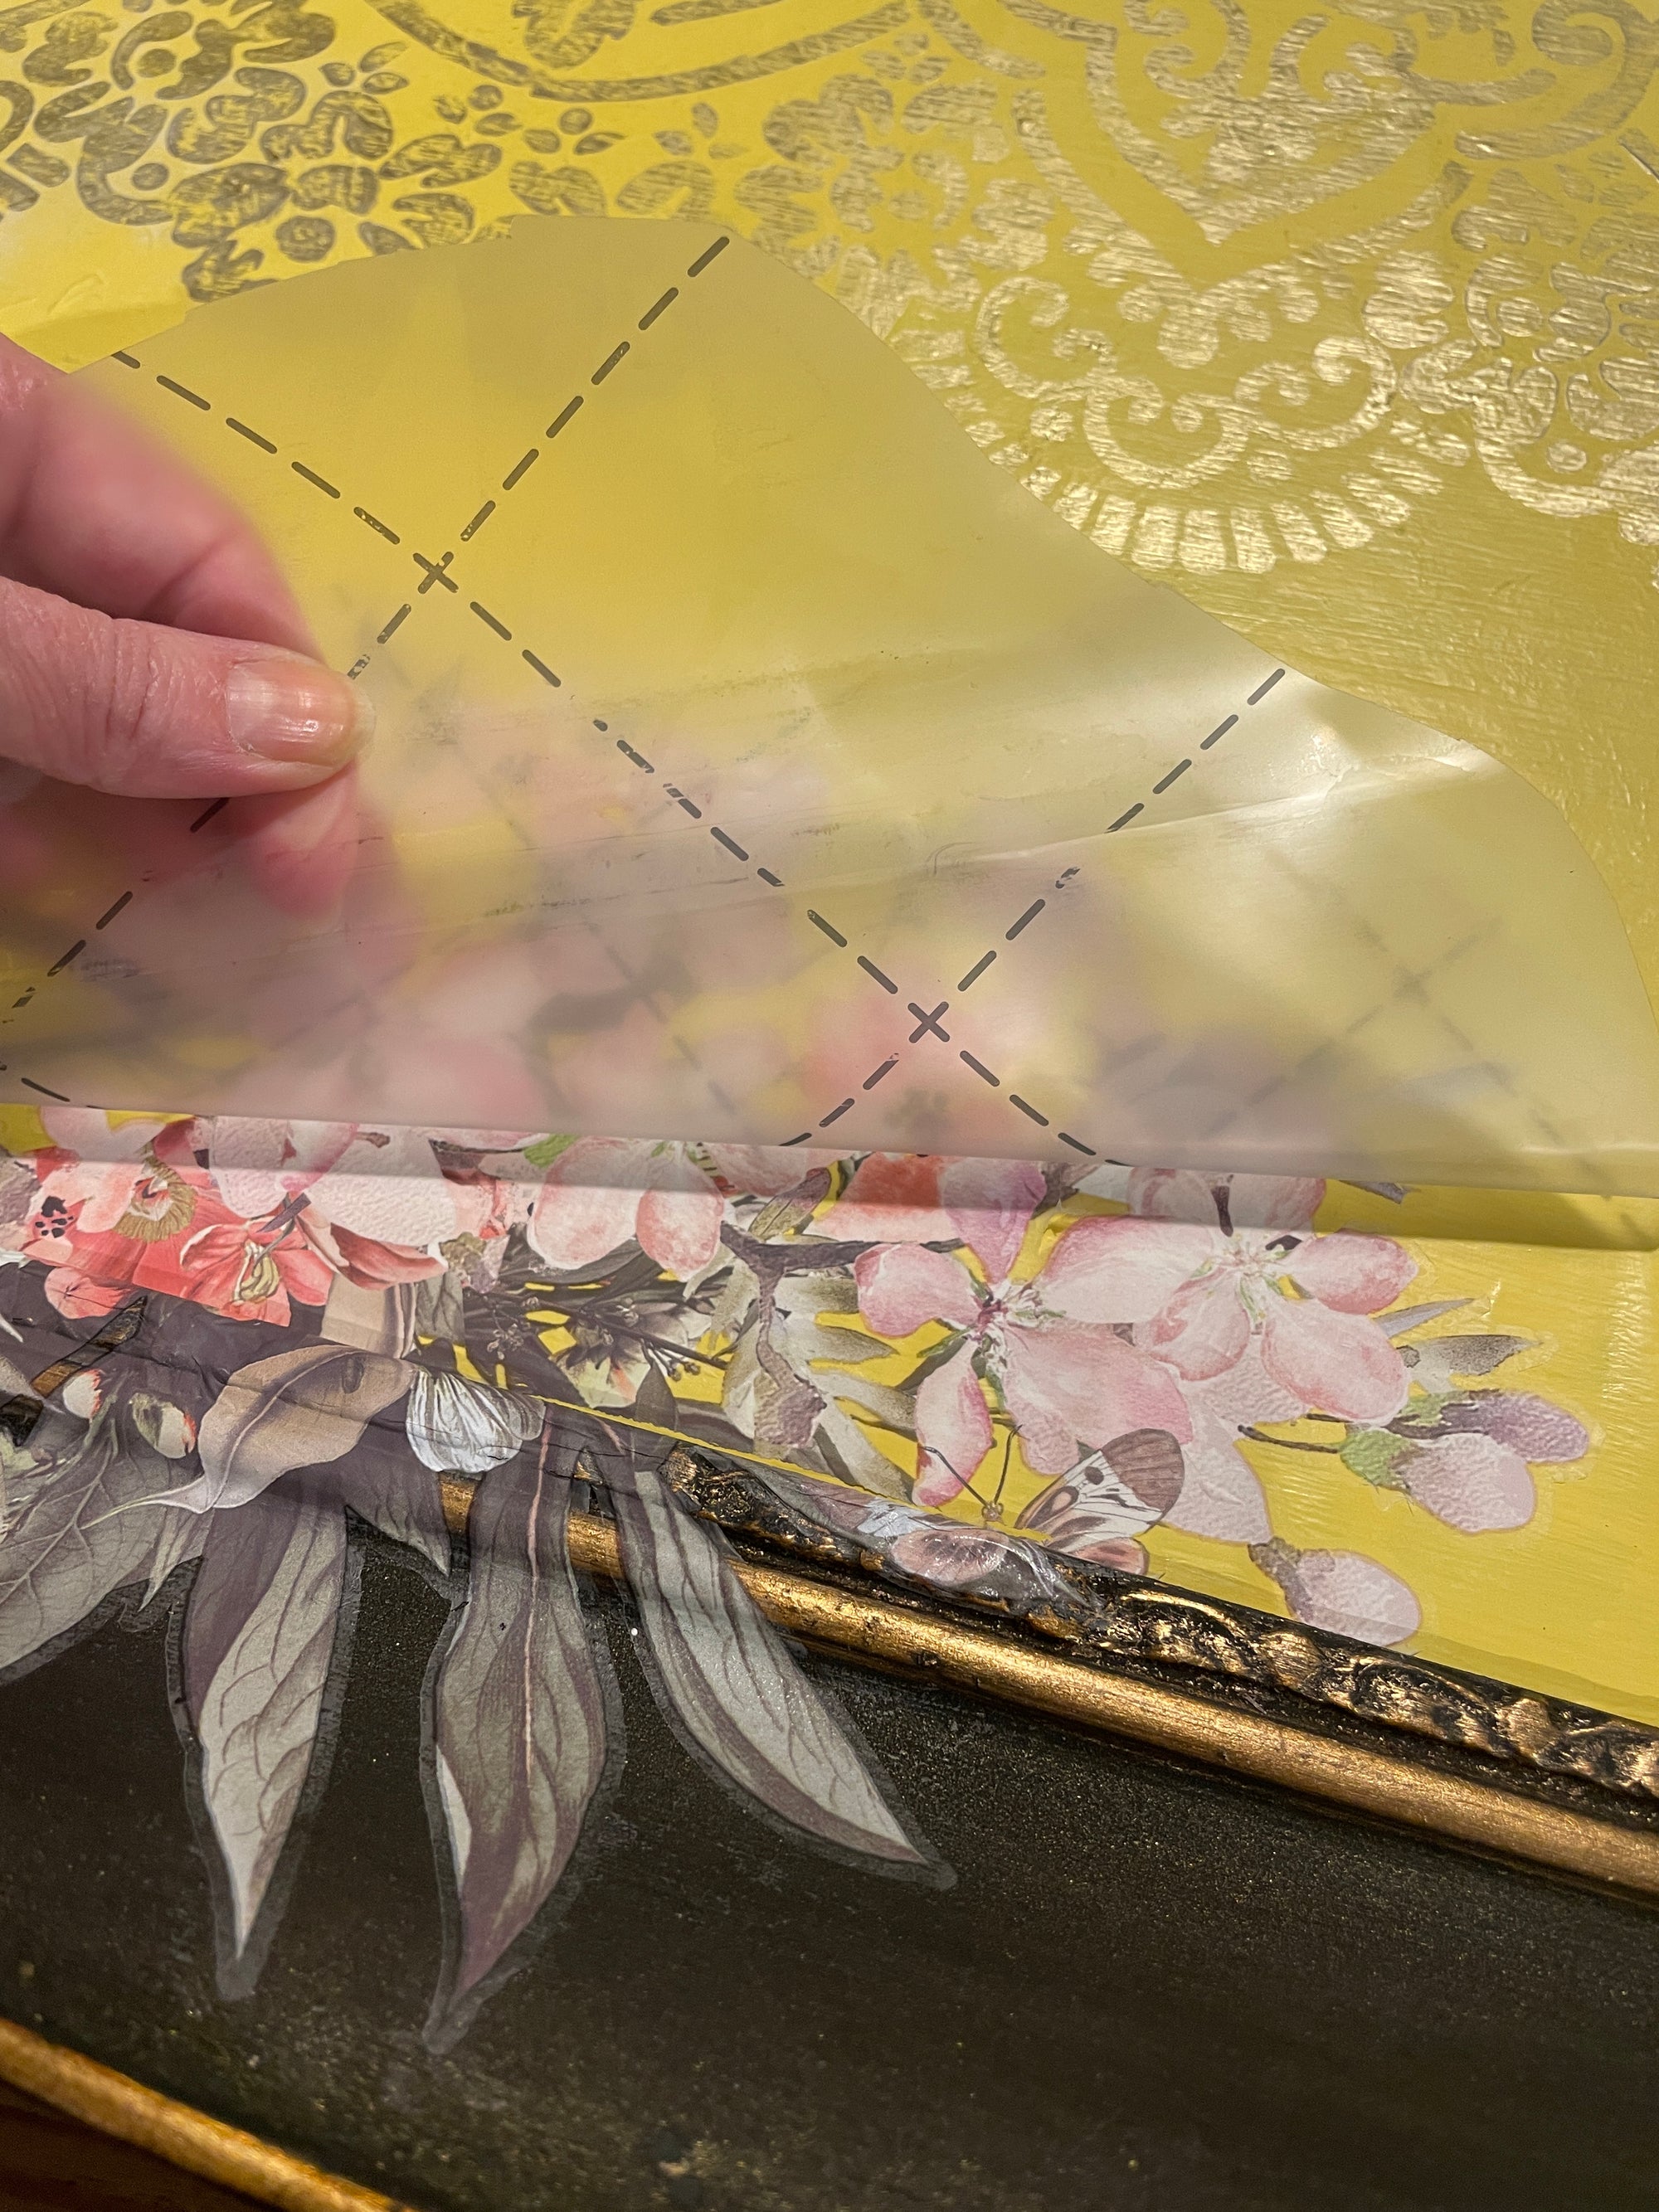
- After opening the sheet or roll, make sure that the backing paper remains attached to the transparent transfer film. Use masking tape, for example. The transfer is extremely sensitive to sticking, so be careful not to touch the attachment surface, i.e. the white surface behind the image. Measure and arrange the design on the surface of your choice. You can also cut out suitable parts from the transfer sheet, meaning you don't have to use the entire sheet at once, but you can divide the design over a larger area or several projects, for example.
- Remove the white backing paper from the transfer and place the adhesive-backed transfer on a clean, dust-free surface in the desired location. Rub the image with a wooden or plastic spatula so that the design adheres to the surface underneath. This is a good time to rub out any air bubbles that may have appeared.
- Fade the edges of the transfer by finishing the rubbing gently with your finger or a transfer pad.
- Once the transfer has been attached and properly sanded to the surface, the work is finished. The finishing is done by applying wax, varnish or furniture polish to the transfer for protection.
You can view the user manual with pictures here.
TOP 6 tips for using transfers - how to create a professional result
With a few tips, tools and products, you can make using decals easier and the end result more beautiful. Here you can read tips from a long-time, passionate enthusiast for the perfect result.
- Be patient and confident. Practice makes perfect!
- Take the time to prepare and plan, as it will make the implementation process easier.
- Start practicing on easy, flat materials. Move on to more uneven, challenging surfaces only after you have gained experience.
- Use a wooden or plastic spatula to apply the transfer. This will help ensure an even and bubble-free finish.
- Before applying the finishing product, use a bonding pad. This will soften the edges of the transfer considerably and this step will make a big difference to the overall look, making the end result look more professional.
- Don't skip the finishing product. The transfer looks beautiful before you apply it, but with a sealer, wax or varnish, you will get significantly more durability to the end result and the pattern will look much more vivid when finished. If you want one multi-purpose product, choose Wise Owl's Furniture Sealer, which is also suitable for maintaining leather products and hiding scratches on furniture, for example.
- Remember to maintain it. Lightly wipe away dust and dirt regularly and avoid scratching and other rough treatment.
Tools and supplies for using decals
In addition to the transfer itself, there are three essential things that make using transfers easier: a transfer tool, a mounting pad, and a finishing product.

Transfer tool - aka spatula
As we mentioned in the tips, a spatula is a great help when applying the transfer. The high-quality Redesign with Prima transfer tool has two different sized heads and a suitably (but not too) sharp spatula will say goodbye to bubbles before they even have a chance to form. Check out the product here .
Mounting pad
A polishing pad is used to rub the transfer and its edges after it has been applied. There are many benefits to using a polishing pad: it helps to remove air bubbles, blurs the edges of the transfer, making them more seamless, and it also polishes and finishes the surface of the transfer beautifully. The Redesign with Prima polishing pad package includes two pads.
Finishing agent
The finishing agent can be, for example, furniture wax, furniture polish or varnish. The finishing agent gives the transfer additional durability and makes the image look vibrant. The same finishing agents are generally suitable for both transfers and chalk paint. Wise Owl's Furniture Polish also has a fragrance (a fragrance-free option is also available!) and can be used at home, for example for leather maintenance. Wise Owl's Furniture Wax, on the other hand, is a clear wax that is suitable for all furniture and is an excellent finishing product even after chalk paint.
Inspiration gallery - amazing transfer projects
Could these masterpieces inspire your next project? These amazing creations were made using decals from Redesign with Prima, for example.

Transfers by theme